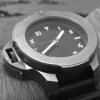
mellons 876 Posted March 18, 2013 Here we go: its been a while since i had a go at one of these cases and i forgot how nice they actually are- plenty of meat on lugs, little light at ends on sides but still very nice indeed. Given that river sells these as complete builds a bit of a case reshape could elevate an already very nice build to a bit higher... Here is a proper documented reshape- perhaps a little too many images but for once i tried to break up reshape into stages i usually adopt. This is in no way definitive and there are some serious reshapers out there that have done much more amazing work with this case set (particularly going for 6154 shape). i dont use a dremel and there are other probably quicker ways to do a reshape: whatever suits. (i think athaya or new river case is the way to go for 6154..) This case was for another member here and i received it tapped for an athaya tube/crown and drilled for lug bars: this is the way to go as you don't want to mess up a reshaped case when doing these mods! The images forwarded were for a 6152 no cg I think in reshaping the battle is knowing what can be achieved, how far you can go with the files. Also half-way through a reshape a case can look pretty scary: i.e. ready for the bin. You can see halfway here how bad it looks..... anyway here goes: Stage 1: mark out areas to be removed. I use an indelible marker and leave overnight to dry (otherwise will come off too easily). Keep bezel on as you want marks to show how far you can go before undercutting bezel seat. Use images from only one case set: as gens were hand done there is a variety of shapes for any given case out there, and you wont get a consistent shape using gathered images. There are a few good sales posts of individual watches- pick one and work to that! See how much black is around the crown tube- we have to smooth this recess out! Stage 2: start filing! first working of case: using a large file rounding top and bottom edges, removing sharp crease to underside of case between lugs, rounding off top area between the lugs etc. The slight crease along both sides must be removed. The recess around the crown has to be gotten rid-of by removing quite a lot of material from the sides around this. The equivalent amount most come off the other side to keep case balanced. Don't bother with lugs yet at this point. Stage 3: second pass on sides with larger file, rounding off top edge, and upper lug work (between lugs). reworking caseback underside. Loosely re-fit bezel to make sure curve correct (and not under-cut): on this one i used a jackson bezel from an old fiddy: shape is much better. You casn see how curved the upper area above and between the lugs is getting here. I dont go near the area just over the lugs at this point (see the lump over the lugs on top) stage 4: 3rd pass on sides (top and bottom), and between lugs (finer file for curvature). Also commencing digging out lug shape over lugs (careful not to remove material from upper surface of lugs). Also work to underside of lug ends at sides to remove slight crease and to visually "beef -up" these areas (get more definition). Also by curving in bottom of case on either side of cg hole we can create a slight raised area around cg tube (curves both sides of and under cg tube threaded hole). We also start to work sides of lugs. You can see lug end shape becoming gradually visible now.... Stage 5:... Going over entire case and lugs again and refining shape with smaller file, removing crease on underside at junction of lugs and case, getting side shape "scallop" right. Also no harm to mock-up using stock silix bezel, a plexi (this one is a solid modded) with stock caseback. If you have the final selection of bezel, caseback and plexi use here to see how shape is forming etc. You can see from this mock-up how there will be no recess around crown tube. Stage 6: At this stage the shape is there, just need to correct areas, smooth out bumps and erase deep file marks. At this point I go back over all surfaces with file wrapped in sandpaper: going at right angles as well as in circular motions, This removes any shine off the case and gives a matt texture- far better for spotting lumps which can be filed off. Then going back over case again by hand with sandpaper, Then going over case with abrasive sponge. This is then repeated. This will give a really nice patina also- like accelerated ageing where case has been polished and worn at intervals. You can see how smooth cg area is. Also on this one i have left material on underside of crown tube like gen (different to previous reshapes). more work to do on lugs and above also! Stage 7: here we go over case again (all areas) with various shaped files wrapped in sandpaper. Then go over with abrasive pad (very fine) in circular pattern: this mimics fine wear (as before also takes shine off case so we can see small file-marks and lumps remaining). After this stage we will mock-up and go over with abrasive liquid. This will not be a high polish- rather it should mimic wear+ intermittent polishing done over years. Different areas of the case will have worn smoother than others (mid-case smoother and around lugs you will see a few marks etc.). One of the nice things about doing this by hand is you can get some nice light marks left on case- these are visible on gens also. On this one i think i will be able to replicate very slight pitting between the lugs: this will be very discrete and will look really well Again keep material around the underside of the crown tube to mimic the slightly raised area that one sees in gens: if you continue the curve under the crown you looks material here and tube is more visible. midcase only before final sand/abrasive liquid and mock-up: Final Stage: more of the same - cycle of sandpaper over file, abrasive pad then abrasive liquid. Final mock-up here using stock bezel and caseback and a modded solid plexi. Just about ready. There are some light wearmarks on case and nicely polished indents etc, just like it has been worn and polished. Hard to get images of very slight pitting between the lugs. Alternately one could highly polish this up also. Share this post Link to post Share on other sites
mellons 876 Posted March 18, 2013 a previous one.... Share this post Link to post Share on other sites
DeLaForce 2 Posted March 19, 2013 Doesn't get any better than this Shame there are no sillix cases anymore.. Share this post Link to post Share on other sites
James. 4 Posted March 19, 2013 Doesn't get any better than this Shame there are no sillix cases anymore.. +1 I've been looking all over :( Nice tutorial, I bought myself a dremmel just to give it a try. Though I possess neither the ability nor fine motor skills to do it properly, it'll probably be fun anyway Share this post Link to post Share on other sites
mellons 876 Posted March 19, 2013 the alternative to this is the new jackson no cg case- realy nice case shape (like his old fiddy) and is like dsn's older one, only with thicker lugs. i must post a reshape of this also fyi Share this post Link to post Share on other sites